GE Washer/Dryer Combo Manual: A Comprehensive Plan
This manual details operation, maintenance, and troubleshooting for your GE combo unit, referencing components like the washer drive belt and dryer venting systems․
GE combo washer/dryer units represent a space-saving solution, integrating washing and drying functionalities into a single appliance․ These units are particularly beneficial for apartments, condos, or homes with limited laundry room space․ Understanding the intricacies of your GE combo model is crucial for optimal performance and longevity․ This manual serves as a comprehensive guide, covering everything from initial setup and daily operation to advanced troubleshooting and maintenance procedures․
Unlike traditional separate washer and dryer setups, combo units streamline the laundry process․ However, they require a slightly different approach to loading, detergent usage, and cycle selection․ Familiarizing yourself with the specific features of your model – as detailed within – will ensure efficient and effective cleaning and drying results․ Resources like ManualsLib offer detailed schematics and operational guides for various GE models, aiding in a deeper understanding of the appliance’s inner workings․
Understanding Your Model Number
Your GE washer/dryer combo’s model number is essential for accessing specific documentation, ordering replacement parts, and receiving accurate customer support․ This alphanumeric code, typically found on a label inside the appliance door or on the back panel, uniquely identifies your unit’s configuration and features․ For example, a model like GUD27ESSMWW indicates specific characteristics related to its size, color, and functionality․
When referencing this manual or contacting GE customer service, always have your model number readily available․ Websites like ManualsLib utilize model numbers to provide tailored manuals and troubleshooting guides․ Knowing your model number ensures you’re accessing information relevant to your specific appliance, avoiding confusion and potential errors․ It also streamlines the parts ordering process, guaranteeing compatibility and a proper fit․
Safety Precautions
Prioritize safety when operating your GE washer/dryer combo․ Always disconnect the appliance from the electrical outlet before performing any maintenance or cleaning, preventing electric shock; Never operate the unit if the power cord or plug is damaged․ Ensure proper ventilation for the dryer to avoid fire hazards, regularly cleaning the lint filter – a crucial step often overlooked․
Do not attempt to repair the appliance yourself; contact qualified service personnel for assistance․ Keep flammable materials away from the dryer․ Supervise children when they are near the appliance․ Avoid overloading the washer or dryer, as this can cause damage and affect performance․ Follow all warnings and instructions outlined in this manual to ensure safe and efficient operation of your GE combo unit․
Washer Operation
Begin by sorting laundry and loading the washer drum, avoiding overloading for optimal cleaning․ Select the appropriate wash cycle based on fabric type and soil level – options typically include delicate, normal, and heavy-duty․ Utilize the detergent dispenser, ensuring the correct amount of detergent is used to prevent residue․ Adjust the water temperature settings according to the garment care label; cold water is often sufficient for most loads․
Press the start button to initiate the wash cycle․ Monitor the progress and address any unusual noises or vibrations․ Once complete, promptly remove the clean laundry to prevent mildew․ Familiarize yourself with the control panel for cycle customization and efficient operation of your GE washer/dryer combo․
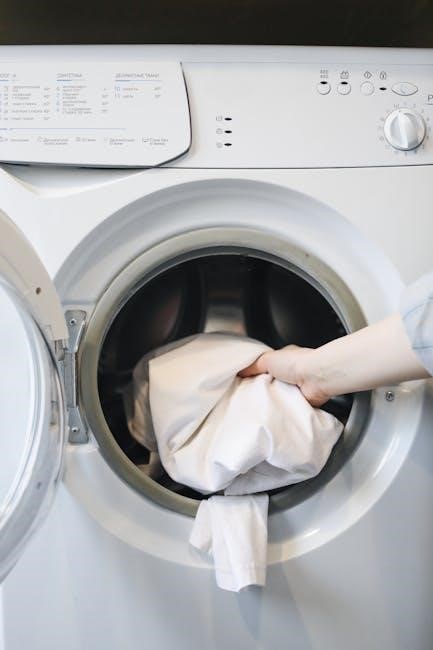
Loading the Washer
Proper loading is crucial for effective washing․ Always separate laundry by color, fabric type, and soil level before loading․ Distribute items loosely within the washer drum, avoiding tightly packed bundles․ Overloading restricts movement, hindering cleaning performance and potentially damaging the machine․
Smaller items should be placed inside a mesh laundry bag to prevent them from getting lodged in the drum or around the agitator․ Larger items, like blankets or comforters, may require a separate, larger capacity machine․ Ensure no items obstruct the detergent dispenser or water inlet․ Refer to garment care labels for specific loading recommendations, maximizing cleaning and minimizing damage․
Detergent Dispenser Guide
The detergent dispenser features separate compartments for various products․ Typically, there’s a section for pre-wash detergent, main wash detergent, fabric softener, and sometimes, bleach․ Always use High Efficiency (HE) detergent specifically formulated for combo units, as standard detergents create excessive suds․
Follow the detergent manufacturer’s instructions for proper dosage, adjusting based on load size and soil level․ Avoid overfilling compartments, as this can lead to residue buildup and reduced cleaning effectiveness․ Regularly clean the dispenser drawer to prevent clogs and ensure optimal performance․ Some models have an automatic dispenser; consult your model’s specific instructions for usage․
Wash Cycle Selection

Your GE combo unit offers a variety of wash cycles to accommodate different fabric types and soil levels․ Common cycles include Normal, Delicates, Heavy Duty, Quick Wash, and Bulky Items․ The Normal cycle is suitable for everyday laundry, while Delicates is ideal for lingerie and sensitive fabrics․ Heavy Duty tackles heavily soiled items like work clothes and towels․
Quick Wash provides a faster cleaning option for lightly soiled loads․ Bulky Items is designed for larger items like comforters․ Refer to the garment care label for specific washing instructions․ Selecting the appropriate cycle ensures optimal cleaning performance and prevents damage to your clothes․ Experiment to find the best cycle for your needs!
Water Temperature Settings
Choosing the correct water temperature is crucial for effective cleaning and fabric care․ Your GE combo unit typically offers options for Hot, Warm, and Cold washes․ Hot water is best for whites and heavily soiled items, as it maximizes cleaning power but can cause fading․ Warm water is a versatile option suitable for most colored fabrics and moderate soil levels․
Cold water is gentle on colors and delicate fabrics, conserving energy while still providing a satisfactory clean for lightly soiled loads․ Always check garment care labels for recommended water temperatures․ Using the wrong temperature can lead to color bleeding, shrinking, or damage․ Consider using cold water whenever possible to protect your clothes and the environment․
Dryer Operation
Transitioning to dryer operation after the wash cycle is seamless in your GE combo unit․ Ensure the load is properly transferred from the washer drum to the dryer drum․ Avoid overloading the dryer, as this can reduce efficiency and lead to uneven drying․ Select an appropriate drying cycle based on the fabric type and desired dryness level․
Familiarize yourself with the available cycles, such as Delicate, Normal, and Heavy Duty․ Proper venting is essential for safe and efficient dryer operation; regularly inspect and clean the vent to prevent fire hazards and maintain performance․ The moisture sensor settings automatically detect when clothes are dry, preventing over-drying and saving energy․
Loading the Dryer
Properly loading the dryer is crucial for optimal performance and to prevent damage to your clothes․ After the wash cycle completes, carefully transfer the wet laundry from the washer drum into the dryer drum․ Avoid forcing large or bulky items, as this could strain the machine․ Distribute the load evenly around the drum to ensure balanced rotation and efficient drying․
Do not overload the dryer; leaving sufficient space allows for proper air circulation․ Overloading can lead to longer drying times, wrinkled clothes, and potential damage to the unit․ Check pockets for any remaining items, such as coins or keys, before loading․ Always ensure the dryer door is securely closed before starting a drying cycle;
Drying Cycle Selection
Your GE combo unit offers a variety of drying cycles to cater to different fabric types and drying needs․ Familiarize yourself with each cycle to achieve the best results․ Common cycles include Normal, Delicate, Heavy Duty, and Timed Dry․ The Normal cycle is suitable for everyday items like cotton and linens․ Delicate is ideal for fragile fabrics requiring low heat․
Heavy Duty is designed for bulky items like towels and jeans, while Timed Dry allows you to set a specific drying duration․ Consult the garment care label before selecting a cycle․ Utilizing the appropriate cycle prevents damage and ensures efficient drying․ Experiment to find the optimal settings for your laundry preferences․
Moisture Sensor Settings

GE combo dryers utilize advanced moisture sensor technology to optimize drying performance and prevent over-drying․ These sensors detect the dampness level of the clothes and automatically adjust the drying time accordingly․ This feature saves energy and protects fabrics from unnecessary heat exposure․ You may find options to adjust the sensitivity of the moisture sensors, allowing for personalized drying preferences․
Higher sensitivity settings are suitable for delicate items, while lower settings work well for heavier fabrics․ Understanding these settings ensures your clothes are perfectly dried without damage․ Regularly cleaning the moisture sensor bars (refer to the maintenance section) is crucial for accurate readings and optimal dryer function․

Venting the Dryer
Proper dryer venting is absolutely critical for safe and efficient operation of your GE combo unit; Incorrect venting can lead to fire hazards, carbon monoxide buildup, and reduced drying performance․ The dryer must be vented to the outside of your home, using rigid metal ductwork or a flexible metal duct․ Avoid plastic or foil venting, as these materials are fire risks․
Ensure the vent duct is as short and straight as possible, with minimal bends․ Regularly inspect and clean the vent duct to remove lint accumulation, which restricts airflow․ A clogged vent significantly increases drying time and poses a safety threat․ Refer to local building codes for specific venting requirements in your area․
Control Panel Overview
The GE combo unit’s control panel is designed for intuitive operation, managing both washing and drying cycles․ It typically features a digital display indicating cycle status, remaining time, and error codes․ A cycle selector dial allows you to choose from a variety of pre-programmed wash and dry cycles, tailored to different fabric types and soil levels․
Dedicated buttons control functions like temperature settings, spin speed, and delay start․ Options for adjusting moisture sensor levels in the dryer are also present․ The panel includes start/pause and power buttons for convenient control․ Familiarize yourself with the specific button layout and cycle options for your model, as variations may exist․
Display Codes and Troubleshooting
The GE combo unit’s display panel utilizes error codes to signal potential issues․ These codes, often alphanumeric, pinpoint the source of the problem, ranging from water inlet malfunctions to drive system errors․ Consult the manual’s dedicated troubleshooting section to decipher each code and its corresponding solution․
Common issues include unbalanced loads (displayed as “UB”), drainage problems (“SD”), or temperature sensor failures․ Before contacting service, attempt basic troubleshooting steps like checking the drain hose for obstructions or ensuring proper leveling․ If a code persists, record it accurately and have it ready when contacting customer support for efficient assistance․ Ignoring codes can lead to further damage․
Drive System Components
The GE combo unit’s drive system is crucial for both washing and spinning cycles․ Key components include the washer drive belt, responsible for transferring power from the motor to the drum, and the drive/transmission pulley, which regulates speed and torque․ A worn or damaged drive belt can cause the washer to fail to spin or agitate properly, resulting in incomplete cycles․
Regular inspection of these parts is recommended․ Look for cracks, fraying, or excessive wear on the belt․ The pulley should rotate smoothly without wobble․ Replacement of these components often requires specialized tools and knowledge; consult a qualified technician if you are uncomfortable performing the repair yourself․ Proper functioning ensures efficient operation․
Washer Drive Belt
The washer drive belt is a vital component, transferring rotational force from the motor to the washer drum, enabling both agitation and spinning․ Constructed typically from reinforced rubber, it’s designed for durability but is susceptible to wear and tear over time․ Signs of a failing belt include squealing noises during operation, the drum not spinning, or incomplete draining․
Replacing the drive belt involves accessing the motor compartment, usually from the rear of the unit․ It’s crucial to disconnect power before attempting any repairs․ Ensure the new belt is correctly routed around the motor pulley and drum pulley, maintaining proper tension․ A loose belt will slip, while an overly tight belt can damage the motor bearings․ Always refer to your model’s specific diagram․
Drive/Transmission Pulley
The drive/transmission pulley system is integral to transferring power from the motor to both the washer and dryer components within the combo unit․ This system typically consists of multiple pulleys of varying sizes, strategically designed to adjust the speed and torque delivered to each function․ The motor pulley initiates the power transfer, connecting to the transmission pulley which then distributes force to the wash drum and dryer drum․
Inspecting these pulleys for wear, cracks, or damage is crucial during maintenance․ A damaged pulley can cause slippage, noise, or even complete failure of either the washing or drying cycle․ Replacement requires careful alignment and secure fastening to prevent imbalances and ensure smooth operation․ Always consult the specific parts diagram for your GE model․
Maintenance and Cleaning
Regular maintenance is vital for extending the lifespan and ensuring optimal performance of your GE washer/dryer combo unit․ This includes routine cleaning of key components to prevent buildup and maintain efficiency․ Prioritize cleaning the washer drum to eliminate residue and odors, utilizing a dedicated washer cleaner or a vinegar-based solution․ Equally important is frequent cleaning of the dryer lint filter after each use to prevent fire hazards and maintain proper airflow․

Don’t forget the exterior surfaces! Wipe down the cabinet with a damp cloth and mild detergent․ Inspect hoses for leaks and tighten connections as needed․ Following these simple steps will contribute to a long-lasting, trouble-free experience with your appliance․
Washer Drum Cleaning

Maintaining a clean washer drum is crucial for preventing odors, mold growth, and residue buildup that can affect your laundry’s cleanliness․ GE recommends performing a drum cleaning cycle monthly, or more frequently with heavy use; Utilize a commercially available washer cleaner, following the product’s instructions carefully․ Alternatively, you can use two cups of white vinegar added directly to the drum․
Run a hot water cycle on the longest setting․ For stubborn residue, consider running a second cleaning cycle․ After the cycle completes, wipe down the drum interior with a clean cloth․ Regularly inspect the rubber gasket around the door for mildew and clean it with a diluted bleach solution (always test in an inconspicuous area first!)․
Dryer Lint Filter Cleaning
Consistent lint filter cleaning is paramount for dryer safety and efficiency․ A clogged lint filter restricts airflow, increasing drying times and posing a fire hazard․ Clean the lint filter before or after every load – do not skip this step! Remove the filter (typically located inside the dryer door or on top of the dryer) and gently remove the accumulated lint by hand or with a soft brush․
Periodically, wash the lint filter with warm, soapy water to remove any fabric softener residue that may build up, hindering airflow․ Ensure the filter is completely dry before reinstalling it․ Additionally, inspect and clean the lint duct (the pathway where the lint filter sits) at least annually to prevent deeper blockages․
Exterior Cleaning
Maintaining a clean exterior enhances the appearance and longevity of your GE combo unit․ Always disconnect the appliance from the power supply before cleaning․ Use a mild detergent and warm water solution to wipe down the cabinet, control panel, and door․ Avoid abrasive cleaners, scouring pads, or harsh chemicals, as these can damage the finish․
For stainless steel surfaces, use a stainless steel cleaner and polish to prevent streaks and maintain shine․ Pay attention to areas prone to spills and splatters․ After cleaning, thoroughly rinse with clean water and dry with a soft cloth․ Regularly cleaning the exterior prevents buildup and ensures your appliance continues to look its best․ Avoid spraying water directly into any openings․
Stacking Instructions (If Applicable)
If your GE combo unit is designed for stacking, carefully follow these instructions for a secure installation․ First, ensure you have the optional stacking kit specifically designed for your model – using an incorrect kit can compromise stability․ Place the dryer on top of the washer, aligning the stacking brackets․ Securely fasten the units together using the provided hardware, tightening all screws firmly․
Verify the stacked unit is level using a spirit level, adjusting the feet as needed․ Never operate the units until they are properly stacked and secured․ Consult the detailed diagrams in your manual for precise bracket placement․ Improper stacking can lead to vibration, noise, and potential damage․ Always prioritize safety during installation․
Water Inlet Connections
Proper water inlet connections are crucial for your GE combo unit’s operation․ Locate the hot and cold water faucets, typically ½-inch threaded connections․ Before connecting, ensure the faucets are fully closed․ Attach the supplied inlet hoses to both the faucets and the back of the washer, tightening securely by hand, then using pliers for a quarter turn more․
Avoid cross-threading to prevent leaks․ Check all connections for tightness after the initial use․ Consider using Teflon tape on the threads for an extra seal․ Regularly inspect the hoses for cracks or bulges, replacing them if necessary․ Incorrect connections can lead to water damage, so double-check your work!
Electrical Requirements
Your GE combo unit requires a dedicated, properly grounded 120-volt, 60Hz electrical supply․ A standard three-prong outlet is necessary; do not use extension cords or adapters․ The unit typically draws between 15 and 30 amps, depending on the model – consult your specific model number for precise specifications․
Ensure the circuit breaker is appropriately sized to handle the appliance’s power draw․ Improper electrical connections can pose a serious safety hazard, potentially leading to fire or electric shock․ If you are unsure about your electrical system, consult a qualified electrician before installation; Never attempt electrical work if you are not comfortable and knowledgeable․
Troubleshooting Common Issues ー Washer
If your GE washer isn’t draining, first check the drain hose for kinks or obstructions․ A clogged drain pump filter is another frequent cause; locate and clean it according to the manual’s instructions․ For error codes displayed, refer to the ‘Display Codes and Troubleshooting’ section․ If the washer is excessively vibrating, ensure it’s level and the load is balanced․
Persistent leaks often indicate issues with the water inlet connections or the drain hose․ Inspect these carefully for tightness and damage․ A malfunctioning washer drive belt can also cause operational problems․ If issues persist after these checks, consult a qualified technician for repair, avoiding self-repair of complex components․
Troubleshooting Common Issues ⎯ Dryer
If your GE dryer isn’t heating, the most common culprit is a blown thermal fuse․ However, always disconnect power before inspecting any internal components․ A clogged dryer lint filter significantly reduces airflow and can cause overheating; clean it after every load․ For inadequate drying, verify proper venting to the outside – kinks or blockages restrict exhaust․
Error codes displayed on the control panel should be cross-referenced with the ‘Display Codes and Troubleshooting’ section of this manual․ Excessive noise during operation might indicate a worn drive belt or issues with the drum support rollers․ If problems continue, contact customer support or a qualified appliance repair technician for assistance, prioritizing safety․
Parts Replacement Guide

Replacing parts on your GE combo unit requires disconnecting power and, ideally, some mechanical aptitude․ Common replacements include the washer drive belt, easily accessible after removing the rear panel․ Dryer heating elements can be replaced, but testing continuity with a multimeter is crucial beforehand․ Always use genuine GE replacement parts to ensure compatibility and maintain warranty validity․
For more complex repairs, like the drive/transmission pulley, professional assistance is recommended․ Online parts diagrams (often found with your model number) can aid identification․ Before ordering, double-check the part number to avoid incorrect purchases․ Safety first: discharge capacitors before handling electrical components․ Proper disposal of old parts is also essential․
Warranty Information
Your GE washer/dryer combo is covered by a limited warranty, protecting against manufacturing defects in materials and workmanship․ The standard warranty typically lasts for one year from the original purchase date, covering parts and labor for repairs․ Extended warranties are often available for purchase, offering additional coverage for several years beyond the initial term․
This warranty excludes damage resulting from misuse, improper installation, or lack of proper maintenance (like lint filter cleaning)․ Keep your proof of purchase readily available to initiate a warranty claim․ Contact GE’s customer support (details provided elsewhere in this manual) to schedule service․ Modifications or repairs performed by unauthorized technicians may void the warranty․
Customer Support Contact Information
For assistance with your GE washer/dryer combo, several support channels are available․ You can reach GE Appliances’ customer service via phone at 1-800-661-1616․ Their website, www․geappliances․com, offers a comprehensive FAQ section, downloadable manuals (including this one!), and the ability to schedule online service appointments․

Alternatively, you can connect with GE Appliances on social media platforms like Twitter (@GEAppliances) and Facebook for quick support and updates․ When contacting support, have your model number (found on the unit’s label) and serial number readily available to expedite the process․ Detailed troubleshooting guides and parts ordering information are also accessible through their online resources․